
We are beginning our year of botany study with seeds. It seems a likely place to begin... at the beginning, but is the seed really the beginning?....or is it the flower? Since the cycle of life is really a circle we just picked a spot and got on. We have used these resources as references and information so far:Exploring Creation with Botany from the Young Explorer series
Seed Babies by Margaret Morley
The First book of Plants by Alice Dickson
A Tiny Seed By Eric Carle


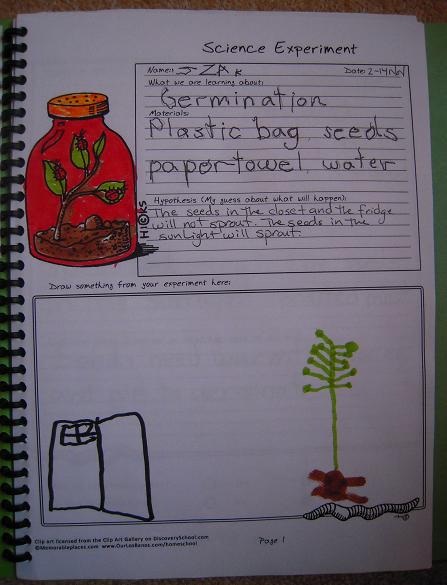
Next we started a germination experiment because we read that a seed only needs three things to grow; warmth, water and air. The boys could not believe this and countered that of course they needed sunshine too! So we went about to discover if what they hypothized was true or not. We took three plastic bags, put a damp paper towel inside with some spaghetti squash seeds. Then we put one bag into the refridgerator (no warmth) and put one in the sunshine (but it was near the window and got cold) and one into a closet. (it was warmer than the window sill bag). Then I assigned a bag to each boy and we made a chart to graph our results by and every day we checked our seeds and looked to see if they sprouted or germinated. On about day six, T.J. who was monitoring the seed in the closet came running into the room so excited to see his seeds sprouting!!!! Eagerly he measured it...1/2 cm yahoo! his had been the first to germinate. Soon the seeds in the bag on the window sill germinated and out grew those in the closet so Zak who was looking after that bag was very proud to measure his sprout at 6 cm on day 12 the last day of the experiment. Max all along knew nothing would happen with his seed but he is now putting in the window sill and plans to plant them once they germinate.

While this experiment was going on (it took 12 days) we were reading seed babies and putting a few more mini books in our lapnotebooks. One day we were reading about melons and pumpkins and ended up getting curious about the amount of seeds we saw in the pumpkin....So of course we had to count them. Our pumpkin had about 613 in all. They were delicious roatsed with olive oil and salt in the oven!

On another day, we "planted" some beans in a jar with paper towels and some water to see it in real life what the new sprout will look like. We took a picture of the nicest sprout and labeled it's parts and mounted the picture on nice paper and put it into the lapnotebook.

Then a few days later, we made a mini book with these sequence cards .


We spent a few different days learning the parts of the seed. the first day I simply showed them my seed part cards and showed them the new names for the parts. The next time we looked at them I cut off the name and asked them to tell me the name that goes with the picture. Meanwhile in other illustrations in our books we named them again. We talked about how the plumule becomes the leaves of the new plant and the radicle becomes the roots; how the testa falls off and how the young plant eats the cotyledon and once the cotyledon is eaten it uses its new leaves to make food. Then the following time we looked at the cards I gave them their own parts of the seed cards and they colored them by coping my cards and gluing the part name on each card. We look at them periodically and later I will review the info with them by having them do a noteboking page about the seed parts.

After a few days we put together our last mini book on seed dispersal.

Inside we drew pictures of each way seeds disperse and pasted in a small text explaining each method. While they drew their pictures I read from Exploring Creation with Botany. The day before I read from All About Plants and how seeds travel.

I found these fun little images to use for a mini book about the parable and the sower. We read it one day, talked a little about it's meaning and then the following day we put this min book together. Inside is the sower and some seeds from our garden that we glued down.

About a week later we went to work doing the copy work for the parable.

And a few days later we played this game....

My game is printed with only black and white but on the web site you can choose to print in color. It would look tons better. The boys, however, enjoyed the game even though it was sort of ugly. We used seeds for place markers.
All in all it took us about one month to cover this little section of botany...... next we are looking at fruits, the houses for seeds.
What wonderful activities your children learned and they created such lovely notes and minibooks. That pro-click binder is still on my wishlist! (Wish they would post it to my part of the world!) Inspiring post!
ReplyDeleteEnjoyed your way of teaching the boys. I have been trying to figure out what the pro-click was when I had seen it in another one of your lessons. I didn't know if you could buy the blank booklets or not or if you had to take the to Office Max or someplace to have them made . thanks for putting that into your writing to help others of us.
ReplyDeleteyou are most welcome!
DeleteI've clicked on the high lighted areas and I can't get any of them to come up for me to use for teaching.
ReplyDeleteI tried all the highlighted links and they all worked, I am sorry you are not having any luck.
Delete